Cleaning circuit boards is a critical step in the later circuit board maintenance, impacting their service life. No matter how precisely a PCB is designed, once it accumulates dust and becomes contaminated, its performance will degrade or even malfunction. From dust and lint to flux residues, corrosion, and water damage, circuit boards can get dirty in many ways. This blog walks you through how to clean circuit boards for 4 common situations.
How to Properly Clean Circuit Boards Covered in Dust or Lint
It’s easy to accumulate dust and lint on the board surface over time, especially in a poor environment. The dust and lint not only affect the board’s appearance but also degrade its performance.
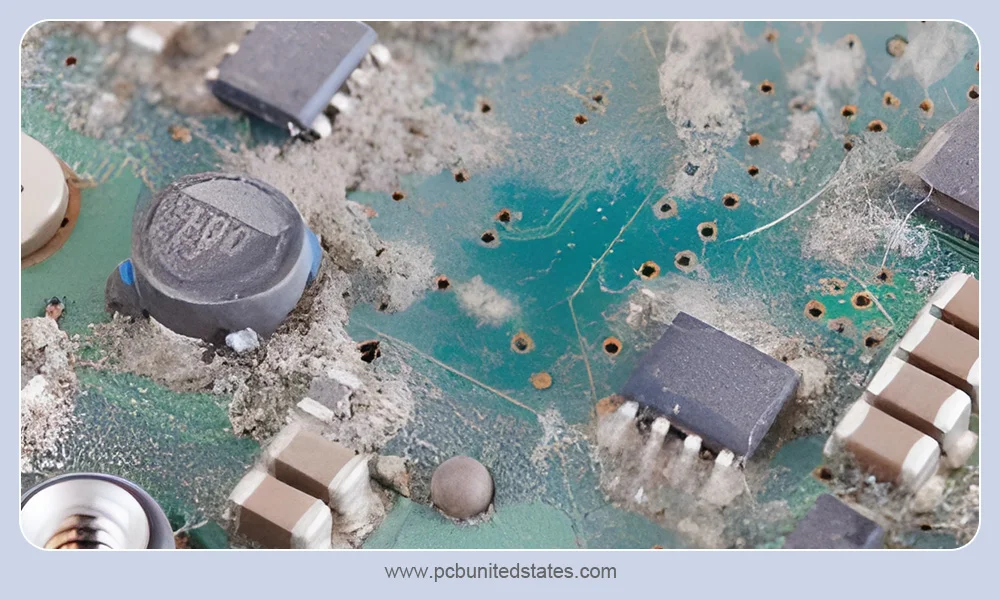
Contamination Signs
- Gray surface with a layer of dust, lint, or fibers.
- Accumulation at the fan outlet or heatsink.
Potential Consequences
- Overheating:Dust or lint can serve as an insulator to affect the normal heat dissipation.
- Short Circuitsand Corrosion Risk: The dust can absorb moisture to form conductive paths, which may cause short circuits and finally increase corrosion risks.
Tools and Materials You’ll Need
- Compressed air
- Soft and lint-free cloth
- Isopropyl alcohol
- Anti-static brush
Clean Circuit Boards Using Compressed Air
One of the most effective and simple methods to clean circuit boards covered with dust or lint is compressed air. The detailed procedure is as follows:
- Power off and disconnect the circuit board.
- Hold the compressed air can upright and spray short, controlled bursts to blow away loose dust and lint.
(Tip: Keep the nozzle at least 5 to 8 cm from the board to avoid damaging small parts.)
- Check for heavily soiled areas and see if the above procedure requires to be repeated.
- With stubborn contamination, use ananti-static brush to clean them.
(Tip: Brush in one direction to prevent redistributing dust.)
- Gently wipe the circuit board surfacewith a cloth and isopropyl alcohol if required.
(Tip: Avoid rubbing too hard to damage the small components with the cloth.)
How to Clean Circuit Boards Affected by Corrosion
When PCBs are exposed to environments with high humidity or salt spray, the circuit boards may corrode over time. This is a result of the metal’s reactions with oxygen, moisture, and other substances. If you clean circuit boards properly, it will stop further oxidation and restore their performance.
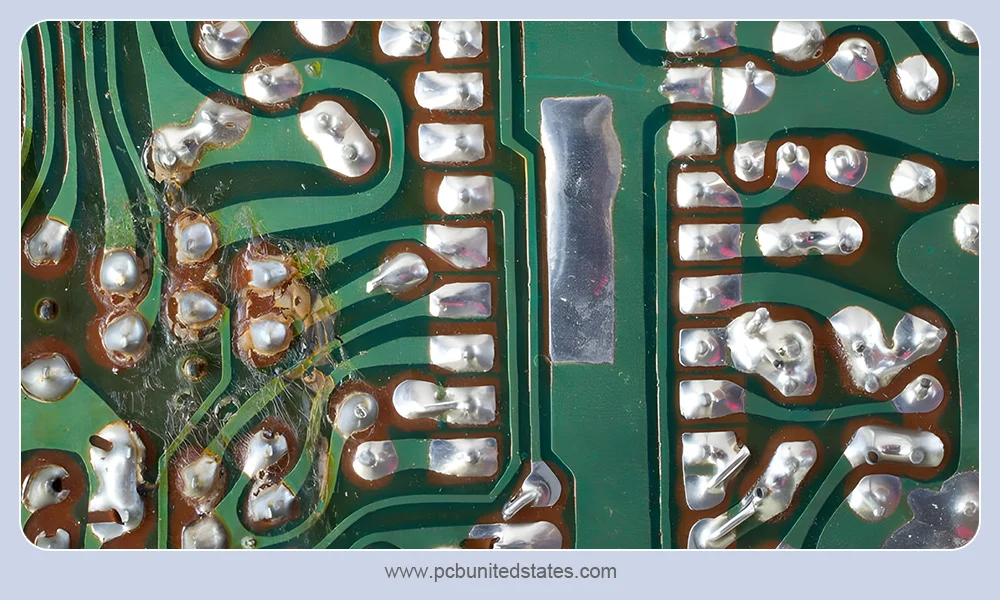
Contamination Signs:
- Tarnishand rust
- Green copper oxide traces
- Chalky white or bluish-green crystals clusteredaround copper-containing parts
Potential Consequences:
- Increased Electrical Resistance: When copper or tin oxidizes, it forms non-conductive metal oxides,increasing the resistance of traces.
- Open Circuits:If the traces or solder joints are gradually corroded, this may prevent current flow and cause open circuits.
- Short Circuits:Conductive debris may fall onto the board and create unintended connections between traces.
Clean Circuit Boards with Corrosion Contamination
Step 1: Power Down and Disconnect
When you plan to clean circuit boards, please power off and disconnect them before starting to ensure safety.
Step 2: Determine the Type of Corrosion
Check the board surface to identify the corrosion type. This is the key to determining the later cleaning methods. Common corrosion situations include battery leakage, environmental oxidation, and liquid damage.
Step 3: Gather Tools
Prepare all the tools and materials to clean circuit boards. For your reference, here is the finished list.
- ESD safe brush
- Cotton swab
- Baking soda
- White vinegar
- Distilled water
- Isopropyl alcohol
- Lint-free wipes
- Compressed air
Step 4: Initial Dry PCB Clean (Mechanical Removal)
Firstly, gently brush away loose crust with an ESD brush over the board surface. Most of the corrosion parts can be mechanically removed. Furthermore, the brushing process helps expose damaged areas for chemical cleaning to penetrate.
(Tip: Be gentle to avoid removing fragile parts or pads.)
Step 5: Chemical Cleaning (Choose Method by Type)
- Alkaline corrosion:Choose white vinegar to clean circuit boards with alkaline battery leakage
- Dip a cotton swab or brush in a proper amount of white vinegar and apply it evenly to the corroded area.
- Wait for bubbles to appear on the surface or for a slight hissing sound to appear. This indicates that the vinegar is reacting with the alkaline residue.
(Tip: Allow to sit for 2–3 minutes to allow the reaction to fully break down the deposits.)
- Gently scrub the lifteddeposits with a clean cotton swab or brush.
- Acidic corrosion:Use a baking soda paste to clean circuit boards with Ni-Cd battery leakage.
- Apply the baking soda paste to neutralize the acid.
- Wait for the full reaction.
- Then, scrub gently.
Step 6: Rinse with Distilled Water and Isopropyl Alcohol
After neutralization, rinse the treated area with distilled water to remove residues. Then rinse with isopropyl alcohol (IPA) to further clean, prevent corrosion, and speed up drying.
(Tip: Avoid high-pressure flow.)
Step 7: Ultrasonic Cleaning (Option for heavy corrosion)
For heavy, widespread corroded areas on the circuit board, it’s recommended to choose ultrasonic cleaning.
(Notice: Remember, some components may be damaged by ultrasonic vibration.)
Step 8: Dry the Circuit Boards Thoroughly
For localized corrosion, remove excess solvent with lint-free wipes. Dry the board with compressed air. Then put the circuit boards in a warm, low-humidity place for additional drying. If possible, dry in a low-temperature oven (~50°C) for 1+ hour to ensure complete moisture removal.
How to Perform PCB Cleaning After Water Damage
Accidents like spills, rain, and even brief immersion in water can cause water damage to the circuit board. If this happens, the device may cease to function properly. Fortunately, if you clean circuit boards quickly and correctly, sometimes they can be restored to function.
Tools and Materials You’ll Need
- Isopropyl Alcohol
- Distilled Water
- Soft-Bristled Brush
- Lint-free cloth
- Compressed Air
- Cotton Swabs
Step-by-Step PCB Cleaning Instructions
Step 1: Turn Off and Disconnect Immediately
Unplug the devices immediately when they get wet. Remove any batteries to prevent electric shock or short circuits.
Step 2: Disassemble to access the PCB
Gently disassemble the electronic device according to its manual to expose the board. Keep a detailed record to reassemble later.
Step 3: Remove standing liquid
Use a lint-free cloth to absorb any remaining and visible liquid. Press the cloth carefully onto the board.
(Tip: Do not rub, as it could damage delicate components. Avoid using paper products, since they can leave lint and damage the board.)
Step 4: Brush Off Dirt or Residue
Use a soft brush to remove the dried liquid or other remaining particles. Then apply compressed air to spray loose dust and dried liquid if necessary.
(Tip: Blow quickly in one direction with compressed air.)
Step 5: Rinse with Clean or Distilled Water
Use distilled or clean water to get rid of sticky particles. To get rid of most of the moisture, gently pat the circuit board with a lint-free cloth and let it dry entirely.
(Tip: If only clean water contacts, skip this step.)
Step 6: Scrub Stubborn Spots
Dip cotton swabs with isopropyl alcohol to clean stubborn residues on the board. The alcohol can finish most of the cleaning without rubbing.
(Tip: Do not use the dripping wet cotton swab. Avoid making the components dirty.)
Step 7: Dry thoroughly
Put the circuit board in a dry and warm environment for more than 24 hours to dry completely.
(Tip: Do not put it in a direct sunlight place.)
How to Remove Sticky Flux Residues from PCBs
When soldering the components to the board, PCB flux is commonly used to achieve reliable solder joints. However, the flux residues can impact the later production and affect PCB reliability if not cleaned properly.
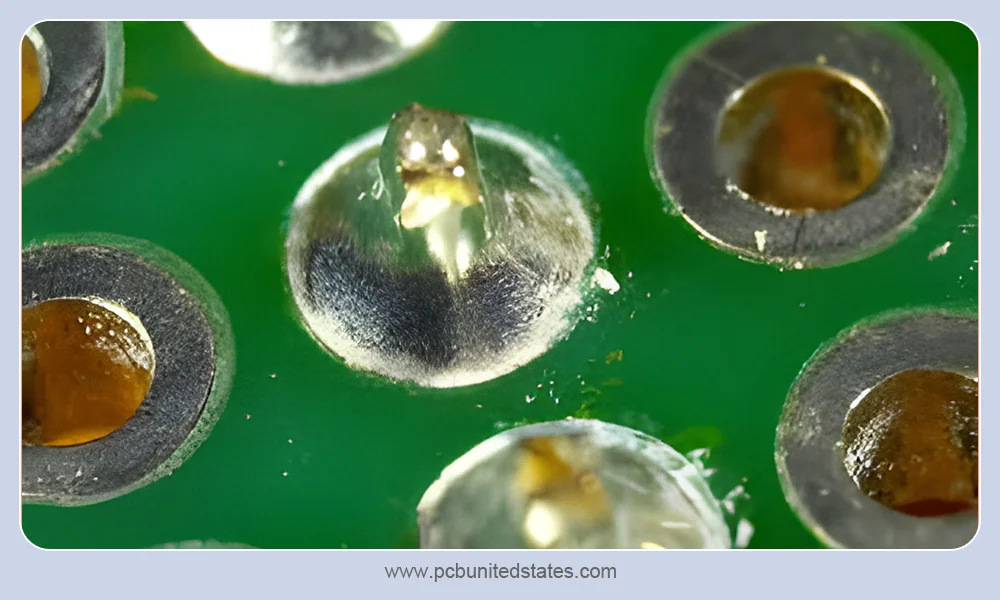
Contamination Signs
- Accumulated on the pins, forming a yellow crust.
Potential Consequences
- Corrosion: Flux residues can absorb moisture, leading to corrosion or short circuits.
- Inspection and Rework Difficulties: Flux residue can obscure solder joints, posing a challenge to later inspection and even rework.
- Performance Degradation:For high-reliability circuits, it’s usually advised to clean all the flux residues, avoiding performance degradation and minimizing other risks.
- Non-Compliance with Industry Standards: IPC guidelines have limitations on PCB residue. If you confirm that the residue is harmless, or that PCB cleaning is necessary.
For detailed steps and tools to clean circuit boards with sticky flux residues, please read our related blog: How to Clean up PCB Flux Manually?
This blog provides a clear step-by-step process for both partial and full-board PCB cleaning with practical tips for better results. In addition to manual removal of flux residues, the article also introduces other alternative PCB cleaning solutions, including aqueous cleaning, ultrasonic cleaning, vapor degreasing, etc.
Takeaway
In this blog post, we’ve introduced how to clean circuit boards with four types of contaminants. Whether dealing with dust, corrosion, water damage, or flux residues, choosing the right PCB cleaning method and following the detailed steps helps restore function and extend the lifespan of electronic devices. If you are still confused about PCB cleaning, contact MOKOPCB to acquire professional assistance.
