As PCBs become increasingly small, THT components are not an ideal option, as they occupy larger spaces on the boards. Surface-mount components that save board space are more and more popular now and are suitable for high-density design. In this blog, you can get a detailed step-by-step process to do SMD soldering and learn some dos and don’ts to acquire better results. Follow these steps, and you can solder surface-mount components to the boards easily.
How to Do SMD Soldering: A Step-by-Step Process
Before the SMD soldering process, you’d better prepare all the tools and materials you may need to use. A thorough preparation helps achieve a successful result and prevents interrupting the soldering process. If you don’t have any ideas, just follow the list below.
What You’ll Need?
- PCB – A board on which you want to solder SMD components.
- SMD Components – Resistors, capacitors, ICs, diodes, QFP, BGA, etc.
- Hot Air Soldering Gun – Use an adjustable temperature hot-air gun for reflow soldering.
- Soldering Iron – Advise to choose a temperature-controlled iron with a fine tip for precise manual soldering.
- Soldering Microscope or Magnifying Glass – Closely inspects the solder joints.
- PCB Stencil (Optional) – Laser-cut stencil to apply solder paste on the board evenly. Suggest using it when components are grouped together in a tiny space.
- Solder Paste – Fine gauge solder (0.5mm-0.7mm) with lead-free is better.
- Solder wire – Thin solder wire with lead-free or tin-lead alloy.
- Flux – Liquid flux, paste flux, no-clean flux pen, etc. To improve the solder flow and prevent oxidation.
- Solder Wick or Solder Sucker – Removes excess solder.
- Spatula or Scraper – Clean the pads or apply the solder paste to the board.
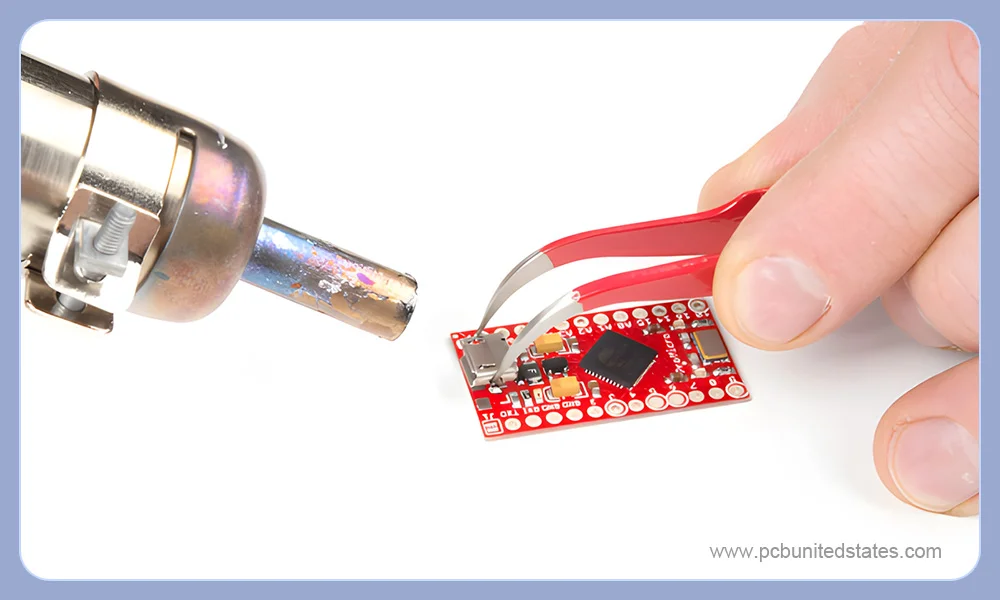
- SMD Tweezers – Helps place the small components on the boards and hold them when soldering.
- Isopropyl Clcohol – Cleans the board (such as flux residues) after soldering.
- Cotton Swabs or Soft Brushes – For gentle cleaning without leaving fibers.
- PCB Holder or Fixture – Keeps the circuit board stable during SMD soldering.
- Anti-static Wrist – Avoid damaging the sensitive components.
Once you’ve prepared all tools and materials, let’s move to the SMD soldering using either of two methods: a hot air soldering gun or a soldering iron. We highly recommend working in a lighting, clean, and properly ventilated workspace.
Manual SMD Soldering with a Hot Air Soldering Gun
Step 1: Clean and Inspect the PCB
After the PCB is manufactured, most manufacturers will seal it with vacuum packaging and apply a thin protective coating on the surface.
- Firstly, use some isopropyl alcohol and cotton swabs to clean the board (such as oil, grime, dust, contaminants, etc) and dry it.
- After that, put the board under the microscope to check traces, pads, vias, etc, ensuring they are all matched with the PCB layout.
- Additionally, make sure the pads are securely attached to the circuit board and not lifted.
Step 2: Apply Paste to PCB Pads
If you only solder several components to the board, simply apply the solder paste to the PCB pads manually. However, for complex PCBs, especially the components grouped in small and limited areas, a PCB stencil is critical to be used. Below is the stencil-using ritual:
- Use a PCB holder or fixture, keeping it stable
- Put the PCB stencil on the board, ensuring alignment.
- Use a spatula to spread the solder paste to ensure all the openings are covered with paste.
- Remove the stencil carefully.
Tips: Don’t Worry About Mistakes! If you don’t apply the paste perfectly, simply clean the board with isopropyl alcohol and try again.
Step 3: Place Components on the Board
This is tough work! Use the SMD tweezers to place the components on the corresponding pads. To secure the components in place, you can apply a layer of flux. Correct component placements can avoid soldering issues like bridges during SMD soldering. It’s advised to prepare a PCB layout with clear component markings and a list of components. Once you’ve placed a component, cross it out on both sheets of paper.
Step 4: Reflow Solder
When all the components are placed in the correct position, you can use the hot air soldering gun to reflow solder. Before starting soldering, turn the gun to 180℃ and pre-heat the board for one minute to avoid thermal shock to the active components. For mass production, the reflow profiles of the components are critical, but for manual SMD soldering, you can wing it. Normally, you can heat it to around 270℃ for one minute to see the phenomenon, in which the solder will melt and the components will be soldered to the correct position.
Step 5: Final Inspection and Cleaning
Don’t think that it’s over after the reflow is completed. There are a lot of solder leftover, flux, and other residues that need to be cleaned. After cleaning, inspect all solder joints under a microscope to confirm there are no bridges, cold joints, or loose pads.
Manual SMD Soldering with a Soldering Iron
Now switch to the other technique, we will introduce detailed steps on how to use a soldering iron to solder SMD components manually.
Step 1: Clean and Inspect the PCB
Regardless of which SMD soldering method you choose, first clean and inspect the PCB. This step is the same as the first step in soldering with a hot air gun as described above.
Step 2: Prepare Solder Iron Tip
Prepping the tip of your soldering iron improves heat transfer and makes soldering easier. To improve the solder iron’s conductivity and ensure smooth soldering, it’s critical to prepare the soldering iron in advance. Follow these steps:
- Heat the iron to around 350 °
- Add soldering tin to the tip, forming a small blob of tin around it.
- Clean the tip by gently rubbing it against a brass sponge to remove the excess solder and oxides.
- Repeat this about 10 times to form an invisible and thin solder coating on the tip.
Step 3: Pre-Tin One Pad
Use iron to heat and pre-tin one pad (usually a corner or one end). Then, a tiny, shiny bump will be formed on the pad, which is an anchor.
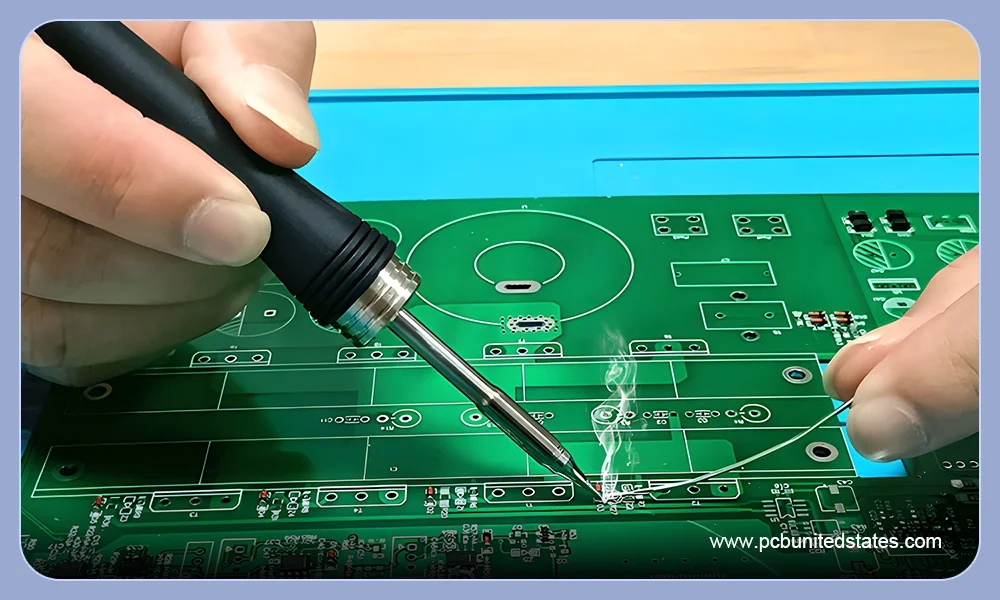
Step 4: Position the Component and Start to Solder
While the anchor pad is formed, you can move to the next step:
- Pick up the component with tweezers carefully, and do not touch the pins with your fingers.
- Place the component in the right position. Gently adjust the position to make sure all pins are lined up with their corresponding pads.
- If solder doesn’tflow smoothly, add a little flux to the pads or leads.
- Heat the anchor pad with the soldering iron to reflow the solder, fixing the component in place.
Step 5: Solder the Remaining Pins
Once the anchor pad is set, solder the remaining pins. Add some flux along the pins to improve solder flow and minimize the solder issues. There are two common techniques to solder:
Point by point soldering: Solder only one pin at a time. Heat the pad with the soldering iron on one hand and touch the solder wire to the joint on the other hand. Let the solder flow, then withdraw the solder wire and iron. Process for 1 to 3 seconds per pad, avoiding prolonged heating.
Drag soldering: Place the iron tip at one end of the row. Add a small amount of solder to the tip, and gently drag it across the pins. Then, the solder will flow smoothly over the pins. If solder bridges occur, use solder wick and more flux to remove them.
Step 6: Inspect Each Joint
After soldering is completed, inspect each joint under a microscope. Check that there are no solder bridges, no lifted pads, and correct the component setting. Then, use isopropyl alcohol and cotton swabs to clean up the board.
Key Dos and Don’ts in SMD Soldering
✅Dos for SMD soldering
- Use a temperature-controlled soldering iron, avoiding overheating.
- Select a proper solder alloy that matches the heat range of your tool. Beginners can choose lead-free solder or tin-lead solder, which are environmentally friendly and easy to work with.
- Use anti-static toolsto protect sensitive components from electrostatic discharge.
- Control soldering duration. Apply the iron briefly (about 1 second per pad) and remove it once the solder flows smoothly.
- Follow the appropriatesoldering temperature, angle, and sequence.
❌Don’ts for SMD soldering
- Do not choose incompatible tools, like solder paste and solder iron. Consider the SMD components that need to be soldered. For example, use ultra-fine solder paste to solder fine pitch components.
- Do not use low-quality tweezers. It may damage or scratch the components, leading to incorrect alignment and placement.
- Do not ignore the safety gear. Fume extractors play a big role during the soldering process, ensuring a ventilated and safe work space.
- Do not apply excessive pressure, which may deform the tip.
- Do not move the components early during the cooling process. It’s easy to cause coldsolder joint
Final Words
After learning this blog, you will have a clearer understanding of the SMD soldering process. DO not be afraid due to the increasingly tiny components and tight pin spacing. With patience and enough practice, you can perform high-quality SMD soldering like an experienced soldering expert.
