PCBs play a big role in all kinds of electronics, ensuring they operate normally. However, the circuit boards are not always reliable and invulnerable. Over time, they may be damaged and cannot work correctly due to many factors, such as shorting, overheating, physical damage, component failure, trace damage, poor design, etc. Fortunately, it’s possible to repair circuit boards, making them run as normal as before. In this blog, we will give you a detailed step-by-step guide to help you repair circuit boards.
How to Repair Circuit Boards: A Step-by-Step Guide to Success
According to different issues, there are exact methods available to repair circuit boards. Here, we’ll concentrate on the general procedures for typical repairs.
Step 1: Inspect the PCB to Identify Damage
Before starting to repair circuit boards, you can inspect them visually with a magnifying glass to identify the damaged part. Or, use a multimeter to check the circuit continuity. These are the obvious signs:
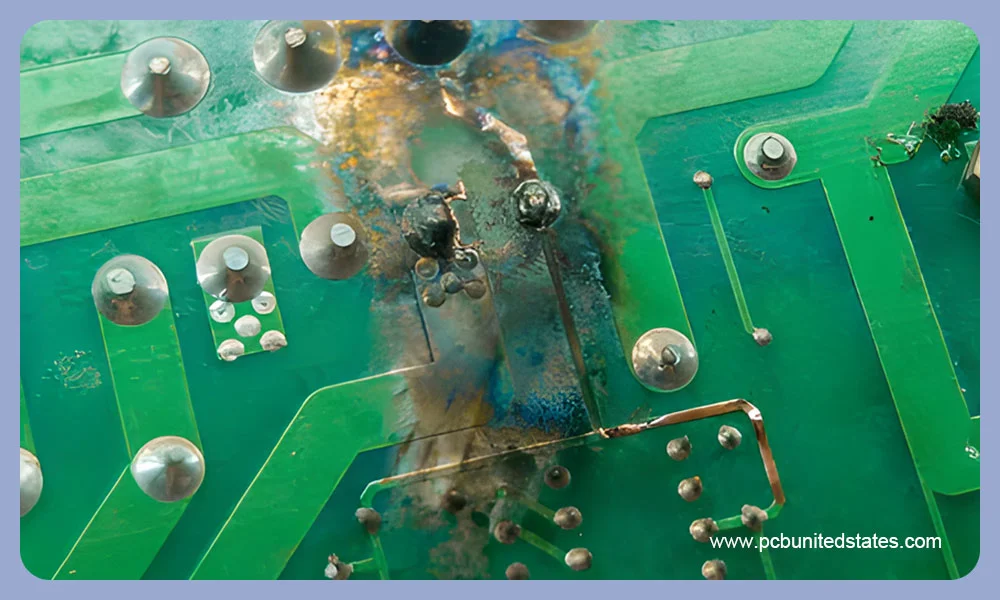
❌Burnt or discolored pats; Contamination
❌Cracked or detached traces
❌Damaged Components
❌Cold or Weak Solder Joints
Once you’ve identified the problems, it’s easy to determine and choose the best way to do PCB rework.
Step 2: Prepare the Necessary Repairing Tools and Materials
To ensure a successful PCB repair process, it’s critical to collect the materials and tools that you may need to repair circuit boards. Not sure what you need? Just following the helpful list below:
- Hot air gun/soldering iron: Melt the solder and connect components to the circuit
- Scissors/craft knife: Trim excess copper tape or clean up damaged board areas.
- Tweezers: Handle small components (fine-pitch ICs ) or place components precisely.
- Adhesive copper tape: A great material to replace the damaged traces.
- Cotton swab and rubbing alcohol: Clean the board to remove any flux residues
- Desoldering pump/braid: Remove and absorb excess solder from pads and vias.
- Flux: Help the solder to flow smoothly and prevent oxidation.
- Multimeter: Test the continuity and voltage of the circuit.
- Magnifying glass: Inspect small components and fine tracks.
- Replacement components: Resistors, capacitors, and other components.
- Solder wire: Establish the electrical connections.
- PCB holder: Securely hold the board in place for stable operation.
- Pen: Mark reference points on the board.
Step 3: Remove the Damaged Components or Pads
It’s easier for you to repair circuit boards with both hands when the boards are held in place with a PCB holder. Then, remove the components.
Using a hot air gun:
- Hold the hot air gun away from the failed component at least 6 inches.
- After a few seconds, try to remove the component with tweezers.
- If unsuccessful, continue applying heat for a few seconds and try again.
Using a soldering iron:
- Use the soldering iron tip to heat the damaged component joints.
- Apply a desoldering braid or pump to absorb the melted solder.
- Carefully lift the component with tweezers.
- If the component is still stuck, repeat the above
If PCB pads are damaged by heat, you can use a knife to remove them carefully. It’s crucial to minimize the impact on the traces and other nearby components.
Step 4: Clean the Track and Eliminate Solder Residue
Next, you need to clean the damaged track to ensure the correct connection between traces and the new component/pad.
- Clean any remaining residue on the track.
- Use a craft knife to cut any damaged parts of the traces.
- Mark the end of the cut trace with a pen to indicate where the new pad or component should be placed.
Ultimately, ensure the track is completely exposed, free of solder, and looks shiny and clean.
Step 5: Place and Solder the Copper Tape
After that, place the adhesive copper tape over the repaired section. Ensure the tape overlaps with the existing track and covers both the through-hole and part of the surrounding area. After that, solder the joints where the new copper tape meets the existing track. These are some useful tips and warnings:
⚠ The copper tape can melt quickly under high soldering temperatures. Confirm that you have prepared to finish in one go. Otherwise, do not start.
⚠ Complete the work quickly to avoid overheating the tape or damaging nearby components, and minimize the heat by using as much as possible.
Step 6: Rebuild the PCB Through-Hole
Press the soldering area firmly with a hard, round-tipped tool, such as a pen. Rub the surface to make sure the copper tape sticks tightly to the pad area. The tape will keep the adhesive soft and sticky after heating. By pressing, you will also see the location of the original hole. When the spot is visible, use a paper clip or a similar pointed tool to reopen the via.
Step 7: Position and Solder the Replacement Components
Now it’s time to install the new component on the board, ensuring that its leads align properly with the pads or vias.
- Hold the component in place with tweezers.
- Apply a small amount of solder to each joint to form a strong connection.
- Double-check that the component is properly connected to the copper tape or track.
Step 8: Trim and Secure the Repaired Area
After soldering, tidy up the repaired section for stability and reliability. Trim away any excess copper tape with scissors or a craft knife. To make sure there are no loose connections or solder bridges, examine the repaired track and joints under a magnifying glass.
Step 9: Clean and Test the PCB
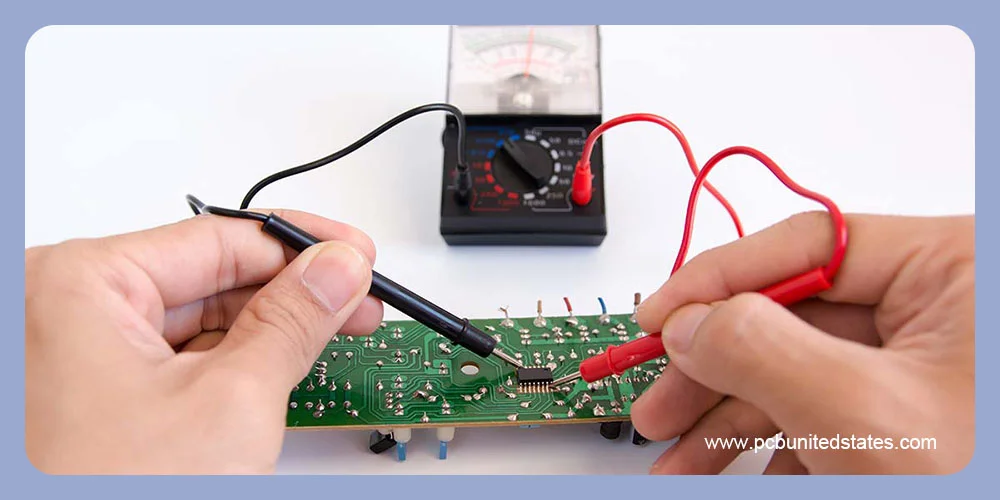
Once the PCB rework is finished, it’s essential to clean and test the boards. Use a cotton swab and rubbing alcohol to get rid of leftover flux and debris. And then, dry the board and make sure it looks clean and shiny.
After the cleaning process, test the repaired circuit with a multimeter to check for continuity and ensure there are no shorts. Finally, power on the board to confirm if it can run normally after PCB repair.
Avoid Top 11 PCB Repair Mistakes for Better Results
Repairing PCBs is challenging, and even minor errors can cause further damage or degrade performance. Here we highlight the top 11 mistakes to avoid when you repair circuit boards, helping you improve rework efficiency.
- Do not understand the circuit completely: Without a complete understanding of the entire circuit, it’s easy to overlook critical points.
- Do not find the root cause: Do not rush to repair circuit boards when the root cause is not identified. This can lead to unnecessary PCB repair or further damage to the board.
- Using the wrong tools: This may cause poor PCB rework or even damage the board with the incorrect
- Using wrong replacement components: The incorrect or incompatible components will not work or can even damage the circuit board.
- Overlooking connections: Double-check all connections for looseness or other issues. It’s easy to cause intermittent problems or complete malfunctions.
- Improper soldering techniques: If you don’t have mature soldering skills, it is very likely to cause some welding issues, including cold solder joints, solder bridges, If applying excessive heat to the board, it may damage pads, traces, or nearby components.
- Skipping post-repair testing: After the PCB rework is done, you should perform tests to verify the PCB’s performance, ensuring the original fault has been fixed and no new issues have been introduced.
- Neglecting safety measures: It’s risky to repair circuit boards, so you should always prioritize safety. Before PCB rework, remember to disconnect the power supply and use appropriate protective equipment to minimize potential hazards.
- Poor board cleaning: Before or after repairing, it’s essential to clean the boards, as the dust, dirt, and other debris can severely affect their performance. The flux residues or tougher contaminants should also be cleaned up.
- Disregarding warning signs: You cannot ignore the warning signs, like smoke or unusual odors. These point to significant issues that need to be addressed right now.
- Not verifying component polarity: The reversed component polarity may damage the circuit.
Repair Circuit Boards Safely: Key Precautions You Need to Know
To achieve effective results and ensure safety, some basic precautions must be followed. Below, we have outlined the key precautions to repair circuit boards, protecting both yourself and the board’s components.
Disconnect Power Sources
You must ensure the device being repaired is unplugged and fully discharged. Capacitors and power supplies may be charged, so be especially careful to ensure they are fully discharged. If there is a backup battery, disconnect it as well.
Wear Protective Eyewear
During soldering, solder may splatter and easily get into your eyes. To keep solder and other small objects out of your eyes, wear safety glasses.
Work in a Well-Ventilated Environment
During the soldering process, potentially harmful fumes are produced. Always repair circuit boards in a well-ventilated environment to prevent absorbing any solder fume. If at all possible, remove fumes using a fume extractor.
ESD Protection
It is easy for static electricity to harm sensitive components. When repairing circuit boards, always take anti-static measures, including using an anti-static wrist strap.
Final Words
It is a valuable skill to repair circuit boards, saving money and extending the life of PCBs. By understanding common repairing steps and using the right tools, you can restore the functionality of many damaged PCBs. However, for some complex PCB rework, including severe damage, complex multilayer boards, SMDs, etc., seeking professional assistance is recommended. If you’re not sure how to repair circuit boards, contact MOKOPCB to acquire an expert solution to avoid further damage.
